Showing posts with label world's best mechanical engineer. Show all posts

Monday, October 13, 2008

how to fly fish like a depression era railroader

trout fishing in america


The second part of Trout Fishing in America by The World's Best Mechanical Engineer.

Rawlins Wyoming is only about 20 miles from the Platte River, and 40 miles from the "Miracle Mile". The Miracle Mile is really the Miracle Six Miles, sandwiched between two reservoirs. It has some of the best fishing in the lower 48 states, and there are plentiful trophy fish in those waters. We never fished the Miracle Mile with our grandparents. Instead we usually fished in beaver dams on the fringes of the Medicine Bow National Forrest. We became specialists in how to fish this peculiar habitat with obsolete gear. Today we still fish the same area, with the same techniques, and with the same ancient gear. Now you too can fish like a depression era railroader, just read on. (Given the current economic conditions, this could be really useful).


To effectively fish beaver dams you need to have at least a passing familiarity with their architecture and environment. The dams we fished straddled the border between the high dessert and the forest. You can stand on top of the plateaus and believe there's no water or trees for 50 miles to the North, and only pines to the south. But when you hike into the canyons, many have spring fed creeks with aspen groves huddling the banks. In this country, where there are aspen groves and creeks, quite often there are beaver. Beaver are amazing critters that completely transform the landscape. They build a dam so they will have a mote for their beaver hut. Gradually they clear the aspen from the banks of the creek. Their short legs do not favor long distance travel on land. So they build beaver runs that extend from the sides of the dam towards the edges of the aspen groves. This allows them to swim most of the distance; they are nothing but grace in the water. Soon willows take root on the face of the dam, providing easier forage for the beavers. The trout usually lie in four main places: in the beaver runs, in the inlets, within a few feet of the face of the dam, and near the entrance to the beaver hut (if you can figure out where that is, it is underwater). Brown trout in particular like to lie in the beaver runs.

The best way to approach a beaver dam is to wade into it from the inlet side. This allows you to have a back cast area that is either reeds, grass, or water, all of which you're unlikely to snag on. It's hard to imagine a more treacherous terrain than the inlet of a beaver dam. There are hidden holes and holes lined with sharp beaver gnawed sticks. The silt is so fine it penetrates and stains everything, and sometimes grabs your feet like quicksand. I've seen my retired grandfather wade into dams like this time and again, and he always emerged in one piece, so you can too. Fan your casts, and if possible align your back cast with a inlets or beaver runs to minimize the chances of snags. It also gives a tiny chance of accidentally catching a trout on your back cast when the fly flashes across the water. I've seen my brother do this a number of times at McLean Creek. If there are any large logs down in the water, fish often lie under them, but your casting needs to be spot on or you may spend your day disentangling yourself from logs.


In the thirties and forties there was only one fishing pole material for the serious fisherman: bamboo. In the modern day world, the bamboo poles have been mostly usurped by graphite and other composites, although there are some very expensive bamboo poles still made. The quality bamboo poles are hexagon shaped. The bamboo is split into very small triangular strips, then bonded together into a hexagon.

Today my brother fishes with my grandfather's pole, although he gives up a few feet of casting distance compared to the yellow Eagle Claw he fished with as a teenager. He uses it in homage to our grandfather, and I have to say he looks brilliant using it. Not that there is anyone watching but me. My grandfather's pole was a nice American made bamboo pole when it was new, probably 60 years ago. He never bought luxuries, this pole is as close as it gets. I'd guess it's probably worth four figures, but it's much more valuable to us as a symbol of an excellent part of our past. Every time he puts it together he rubs the connectors on his neck to lubricate them just a little with skin oil, just as my grandfather had taught us.

I had my grandmother's bamboo pole repaired a few years ago and I generally fish with it. The first time I ever caught a rainbow trout it was with this pole. I was probably 8 or 10 years old, and when the fish hit I grabbed the pole and dashed full speed up the bank. Unfortunately in my excitement I broke the pole cleanly in two.

By coincidence the pole builder that repaired my grandmother's pole had a nearly new WWII era Japanese bamboo backpacking pole that he'd picked up in a trade. I bought it from him for remarkably little. Today grandmother's pole needs some more repair, I'm a bit hard on equipment. In the meantime my backpacking pole fills my need for an antiquated bamboo pole quite nicely.


You can actually pick up an antique bamboo pole on ebay at a remarkably cheap price. The Japanese WWII era poles aren't considered to be very lively, but for $25 you can't complain too much, it's worth that much as a conversation piece. There are American made poles that are better quality that run from $25-$1000. Most poles came with at least one extra tip, try to find one that still has the extra tip in tact. If the original cloth carrier is still with the pole, all the better. Find a pole with hexagonal sections, not round. Generally speaking a longer pole will allow you to cast a little further, so I'd get a 9 footer if available but it's not mandatory. It's hard to believe how many of these vintage bamboo poles are still around in decent or even pristine condition. Your antique bamboo pole may or may not be the finest fishing pole in the world, but when you have a golden brown bamboo rod in your hand you will feel like you can catch fish.

Dry the pole off when you are done fishing, and when you take the pole apart pull on the metal connectors, not on the bamboo sections. This will prevent unnecessary stressing of the bonded joints. (A little engineering aside here: fishing rod connectors are universally designed wrong in my opinion, and are therefore prone to pulling off the rod they are bonded too). In the event two sections of the pole won't come apart, squat down and put the pole behind your knees. Grab one side of the connector with each hand, put the pole in the crease at the back of your knee joints, then spread your knees apart. This technique provides excellent leverage, and almost no risk of breaking the pole accidentally.

For railroader style fishing you have a couple of reel choices. Engineering has come full circle on fly reels in the last 100 years. They originated as simple spools then evolved into the wind up "Automatic" Shakespeare style spring loaded reels, then they devolved back into the simple spools. The "automatic" Shakespeare reels had a clock spring that you wound up. When you wanted to take in line, you pressed a lever on the reel and it retracted the line automatically. Sure they have fancier drag and ratcheting mechanisms, but at the end of the day it's still a wind up spool. Modern reels may be made of aircraft aluminum and have 500 lightening holes in them, but to tell you the truth I've never lost a fish that I thought, "I would have caught that one if my reel was just 5 grams lighter". Today I use one of my grandparent's very old wind up spool reels, probably from the 30's or 40's. My brother uses a wind up Automatic Shakespeare reel, probably from the 1960's. Oddly in many ways his reel is more antiquated than mine since no one uses the "Automatic" reels anymore. You can pick up one these automatic reels for about $15 on ebay, keep your eyes open and you might get one with fly line still on it. Or you can get a spool type fly reel. Some of the antique ones are super stylized turn of the century designs in both brass and nickel-plating. It looks like the spool type reels range from $10- $50 on ebay, and some of them are pretty sexy. Whatever reel you choose, a drop of oil or two will probably extend the life substantially.

You'll want to get floating fly line from a tackle shop if possible. Fly line is a little expensive, but it'll last a decade or two. There are two reasons a tackle shop is worth the few extra bucks for fly line. First, they can look at your pole and recommend a fly line weight that will cast decently for that particular pole. Since I change my gear so rarely (like never), I don't have a good grip on how to match the line to the pole, but the guy at the fly shop will. I'd put it to them as a kind of hypothetical question, "Supposing hypothetically I wanted to fish this ancient bamboo pole and H.G. Wells reel, what weight of line would I want?" The second reason to go to the tackle shop is to deprive the nimrods at Wal-Mart of your business.

While you're at the tackle shop, you'll need a tapered leader too. This is where some of the depression era thinking comes into play. Modern fly fishermen will fish with anywhere between 7 and 10 feet of leader. My grandfather would buy double tapered leaders, and cut them in half so he'd get two leaders for the price of one, but each leader was only about 4.5 feet long. I don't know if he also liked the improved controllability of the shorter leader. You can't buy double tapered leaders anymore, so my brother and I cut down regular tapered leader to about 4.5 feet long. This is where our methods sharply depart from the usual modern methods. We tie a loop on the end of the leader, just as you would a bait hook leader.

Our flies are snelled to match. All modern fly fishermen tie the fly directly onto the end of the leader, then cut it off when they want to change the fly. Snelled flies allow us to change flies quickly without gradually cannibalizing our leaders, and the fly is easier to change when your hands are cold. The only down side is that we will occasionally loose a fish that strikes at the knot between the snells instead of striking at the fly. . Today it's impossible to buy snelled flies, we buy them and snell them ourselves with about 5 inches of leader. You can look elsewhere on the internet for the knots (the knot to tie the fly to the leader is a cinch knot). One upgrade we've made to the knots is we put a tiny drop of super glue on both knots on the fly to diminish the odds of knot failures.

My grandfather almost always purchased dry flies, but wet fly fished with them. He used to buy some of his fishing flies at the territorial prison in Rawlins, where they were made and snelled by inmates. In wet fly fishing you typically let the fly land on the surface of the water, then it usually sinks below the surface while you draw it toward yourself for maybe 10 seconds. He wasn't fishing with dry flies by choice so much as it was nearly impossible to find wet flies when we were kids: everyone was dry fly fishing at that time. In dry fly fishing you make several overhead casts to dry out the fly, then let it sit on the surface for only a few seconds, and periodically dip it in a fluid that helps it float. As a result dry flies are lighter and intended to float, and wet flies tend to be have heavier bodies and are more inclined to sink. It's been my experience that there are few dry fly patterns that won't sink eventually.

My grandfather always fished with two flies on his leader. The second fly is attached to a loop about 16" from the top of the leader. Fishing with two flies has a several advantages: it allows you to try out different fly patterns faster, and it offers two different potentially appetizing meals to the trout. You can also use the upper fly to alter the presentation of the fly on the water. A "parachute" pattern on the top fly tends to kind of float down onto the water, which is great if the fish are easily spooked. A large beetle type pattern can be used on the top fly to limit the sinking depth of the bottom fly to keep it out of moss or other obstructions. There is a downside though, and that is in mossy conditions a multiple fly rig will get fouled more often. Mossy damns seem to go hand in hand with lots of trout, so this can be a chronic problem. Over the last couple of years I've evolved over the last few years towards a single fly while my brother continues to use two. I guess that some of the old timers used to use 3 flies, but this would seem to be a cumbersome rig at best. A few good patterns if you're getting set up with gear are Parachute Adams, Mosquito, Royal Coachman, and Wooly Bugger. It's a good idea to get something of a smorgasbord of colors so that if you see a hatch of something on the water you can at least match the color. My brother and I both prefer the buggier patterns, flies that look like they are a little beat up. There is a school of thought that the smart trout prefers the injured insect to the intact one because it is less likely to get away. This follows from an entire First Law of Thermodynamics view of hunting animals, that the caloric energy expended on hunting prey must be less than the caloric value of the prey, or the hunter will perish.

Sadly a few trips back the plastic sheets in my grandfather's fly book were shattered by baggage handlers on my plane. It was designed for snelled flies and seems to be irreplaceable. Even ebay doesn't seem to be help on this obscure artifact.

My brother and I make an annual pilgrimage to Wyoming to fish the same general areas. For decades we were able to fish a set of dams just inside Medicine Bow National Forrest. My Mother had fished these dams, and my grandparents had fished these dams all the way back to probably the 1930's. My brother would routinely catch between 20 and thirty fish in an evening (catch and release). A few years back however, they logged this valley down to pretty close to the water. The fish vanished. I don't know if they spilled something in the water, or fished it out, or if too much silt is reaching the creek in the absence of the forest. But the brookies are gone.

Our other great traditional spot was the Red Meated Dams (we named these dams after the pink meat possessed by the monster brook trout in these waters). Unfortunately some calamity befell these dams as well, and a few years back the fish vanished from this dam as well. I suspect that they possibly got too warm one hot summer. The fish at this dam always bit right at dusk, possibly due to the water being marginally high for trout in the first place.

The combined failures of these two waters have forced us to look for new dams. It's difficult since some end up being on private property, some washed out, some are too shallow, and some simply lack trout. But there are the few with spectacular fishing. My brother and I recently caught (and released) over fifty fish in a single afternoon in one set of dams. The last couple of years we've also been experimenting with fishing some alpine lakes in the nearby Snowy Range. But in the alpine lakes it is us who are the fish out of water.

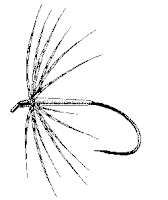

The End.

Sunday, September 28, 2008

trout fishing in america


From the time we were very small my brother and I would spend a week a year at my grandparents' house in Rawlins, Wyoming. Their house was Union Pacific White, as I suspect all of their houses had been for the last 50 years. It sat next to the railroad tracks, as they all had. Behind the house there was a coal shed, a predecessor of the grating covered gas furnace in the center of the house. Further behind the house there was a concrete building that had housed dynamite for the railroad crews. Even further behind the house were three giant mountains of cinders, left over from the days of steam engines. The front driveway was a railroad loading dock for Uranium ore, which most likely contributed to my grandfather's eventual losing battle with tumors and cancer.

My grandfather worked on the Railroad for 50 years. When he was a teenager, his father had left him alone for weeks at a time on a homestead near Tie Siding, Wyoming. My great grandfather would go and work on the railroad bridge gangs, my great grandmother would cook for the bridge gangs, and my grandfather would stay on the homestead alone as part of the "proving up" requirements of homesteading land. He would travel the several miles to school and back on horseback each day.

I was a child when my grandfather was already an old man. Five decades of railroading had made my grandfather weathered and strong, like saddle leather. At 65 he was still as strong as John Henry.

But this is not a story about railroad houses or railroaders. The U.P. White house was not the object of our trips, it was merely a staging area. Our trips to Wyoming were all about fishing with our grandparents. This is a story of fishing gear and fishermen.


Part one in on-going series in which the World's Best Mechanical Engineer, aka B1-67er, will write about fishing gear and fishermen.

Stay tuned.

Saturday, July 07, 2007

what goes around comes around

The World's Best Mechanical Engineer had a few questions for the six-year-old Joe-Henry -- his response is up over at anniemcq's »

Monday, June 25, 2007

the best thing


balsa wood airplane
Originally uploaded by Ray G.

It's with a heavy heart that I announce Part VIII in The World’s Best Mechanical Engineer Explains It All for You series, with our Special Guest Star: The World's Best Mechanical Engineer.

Why the heavy heart? This is the last of Joe-Henry’s questions for the World’s Best Mechanical Engineer. If we’re going to keep this thing going we’re going to need more questions, gentle reader. There’s a comment box below – please, if you value the dispersion of mechanical engineering know-how across the blogosphere: Use it.[1]

Of course, on the upside, the World's Best Mechanical Engineer has promised to ask Joe-Henry a few questions once this series wraps up.

Joe-Henry,
The last unanswered question you asked was:

Q. What's the best thing about being a mechanical engineer?

A. We'll jump straight to the experiment on this one. You will be an aerospace engineer for a day. I will be a marketing guy for a day (ick).

As your marketing director, I tell you that I want you to design a balsa wood airplane with a 12 inch wingspan. This is just how it works in real life except the marketing director will say something vague and nebulous like, "I want an airplane just like the Competition's -- only better". It's a good thing I'm your marketing guy.

You don't have to build an airplane if you don't want too. You can build something else instead, like a boat. But my experience is that if the marketing guy asks you to build an airplane and you build a boat instead, they get very upset, even if it IS a great boat. You'd be surprised how often this happens.

So hop in the Galaxy and go to the hobby shop with your Mom.

  • You'll need a sheet of 1/8" thick balsa wood (usually 4" wide by 36" or 3" wide by 36").


  • Also buy a stick of balsa 1/4" x 1/2" or 1/4"x1/4". They'll probably be 36" long also.


  • Get some Elmer’s glue and some modeling clay.


  • You'll need a little bit of sandpaper, but your Mom's nail file will also work if you use it when she's not looking.


  • Also have your Mom buy a small x-acto knife if she doesn't have one already.


  • Also buy 3 Mountain Dews (4 if your Mom wants one).


You should have enough materials to build two planes. Your Mom may complain that this is like $15 worth of stuff to build a balsa wood airplane. Assure her that prototypes are always expensive -- the production model will be much cheaper (she doesn't know this, she's not an engineer).

When you get home, measure out a 6" length of the 1/8" balsa wood. With a magic marker, lightly draw the shape you want your left wing to be on the balsa wood. YOU get to decide the wing shape because YOU are the aerospace engineer. Don't get too wild with the first design, save the more advanced designs for the second airplane. Have your Mom cut out the wing with the Exact-o knife. Lay it on top of the balsa wood sheet and trace it with a magic marker. Have your Mom cut it out, this will be your right wing.

Use the sandpaper to round the front edges of the wings off. Then use the sandpaper to sand the rear edge of the wing to a point (sand off the top rear corner of the wing). You are trying to give the wing a little bit of an airfoil shape. See the picture of the rounded front wing edge and the tapered rear wing edge.


Round the front edge and taper the rear edge of the wing.

This is the point where most science teachers would talk about the Bernoulli Principle being the explanation for why airplane wings lift the plane. But it turns out that's not really the main reason. It's just that Bernoulli's public relations department did a really good job convincing people that this was the main reason. In reality when flying the wing is tilted just a little bit back. The force of the air hitting the bottom of the wing pushes up on the wing.


The tail will be one piece. Make it about 1/3 the length of the wingspan (12"/3= 4"). Again: You get to decide the shape. Now make the rudder 2" long. The wood grain on the rudder should run vertically so it will be strong. As always, You get to decide the shape.

Now you will glue the wings together. You made a separate left and right so that you could put the wings at an angle compared to each other. This is called a dihedral angle, and it makes the airplane much more stable. Hit your Mom up for a stack of coins. Lay one wing on a sheet of paper. Put some Elmer's glue on the mating surface of the other wing, then use the stack of coins to prop the wing tip up off of the surface of the table about 2.5".


Prop the wing with coins to create the dihedral angle.

On another sheet of paper, glue your rudder to the top of your tail. Use the unopened Mountain Dew cans to hold the rudder in a vertical position. (See pic).


Use Mountain Dew cans, the Engineer's friend, to hold the tail square.

Pop open the other two Mountain Dews and take a break while the glue dries.

Cut a 12" long piece of the 1/4" thick balsa stick to be the fuselage of the airplane. Glue the entire tail assembly to the rear of the fuselage. Use coins to make the tail level.

After the tail has dried, glue the wings to the fuselage a couple of inches behind the tip of the plane. (See picture). Hit your mom up for a fistful of coins to use to hold the wings and tail even while the glue is drying. R&D costs money.


Use coins to level plane wings and tail.

The last step is to balance your plane using modeling clay. The plane should balance on a pencil placed under the middle of the airplane wing. Add modeling clay to the nose or tail of the plane to make it balance under the center of the wing (see picture). You'll probably have to add weight to the nose.


Plane should balance under the center of the wing.

Now take your plane outside and gently throw it against the wind.

STOP! The anticipation the second before the plane leaves your fingertips, and the satisfaction when it flies.... those feelings are the best things about being a mechanical engineer.


If the plane dives into the ground, move weight to the tail or remove weight from the nose. If the plane stalls (climbs quickly, almost stops in the air, then dives towards the ground), add weight to the nose. If it banks to the right, add clay to the left wingtip. If it banks to the left, add clay to the right wingtip.

A college professor once told me that design is an iterative process. Iterative means you do something more than once, and each time you do it you get closer to the right answer. Build another plane with the other half of your wood. Change all the things you didn't like about the first design. Experiment with your wing design. Put Jefferson Airplane's White Rabbit on the stereo. Dig being an engineer.

Your pal,
B1-67er

Ed.: aka The World’s Best Mechanical Engineer


Also in this series:


[1] I should add, the World's Best Mechanical Engineer is under no contractual obligation to answer any more mechanical engineering questions -- heaven knows if he even has time -- but we won't know until we try now, will we? Comments. Below. All yours.

Wednesday, June 20, 2007

faves from the world's best mechanical engineer


The Ride
Originally uploaded by thepres6.
Part VII in The World’s Best Mechanical Engineer Explains It All for You series, with Special Guest Star: The World's Best Mechanical Engineer.

Joe-Henry,
I'm postponing the answer to number 7 because it's going to take a little preparation to answer it correctly.

Q: What is the favorite thing you've designed?

A: That's like asking what's my favorite work of art in the Louvre (the Louvre is a big museum that the French think is the best). [Ed. I think J-H has put in some time there: we’ll wait for him to comment.]

Here's a few of my fav's:

  • A cargo loader that you drive up to the airplane and unload big 15000 pound cargo containers (think of putting all the kids in your class AND the school bus in a big box). I liked this project because we worked on it for a long time and really perfected a lot of the machine. It would even tell you when there was something wrong with the electrical system, and what was wrong.


  • A machine that generated electricity when you drove over it in a car. I liked this project because it was the most original idea that I have ever worked on. It was also a project that at first I thought was a bad idea, but as I did the math and figured out what was possible, I eventually decided it was a good idea after all.


  • A machine for harvesting Spinach. I liked this project because it was quick and the design ended up being elegant. Elegant means both simple and beautiful at the same time. Tell your Mom she's elegant when she's dressed up. She might buy you a Mountain Dew. The machine has a saw, blowers, shakers, conveyors, and drives like a tank. But it has no electrical complexity at all, no computers or controllers. Most mechanics can fix it even if they've never seen one before. If they can't fix it they shouldn't be mechanics. They should be politicians.


  • I also did some consulting for a motorcycle company helping them improve the reliability of their motorcycles. It was interesting because I learned a lot about instrumentation. Instrumentation is when you put special sensors on a machine that tell you things like how fast they are vibrating, how much they are stressed, or how hot they are getting. This is super useful if a part is failing and you can't figure out why. This job was also cool because it makes people say things like, "OOOH MOTORCYLCLES!". Their eyes light up. Sometimes the women swoon.

Pop open a Mountain Dew (your Mom should be stocking it by now) and check out pictures of some of the machines I've designed at www.scottharlanpe.com.

Your Pal,
B1-67er

Ed.: aka The World’s Best Mechanical Engineer


Also in this series:
get it in gear
busta dew
holy hydraulics, batman!
solenoid spectacular
springs & things
the world's best mechanical engineer explains it all for you

Sunday, June 10, 2007

get it in gear

Part VI in The World’s Best Mechanical Engineer Explains It All for You series, with Special Guest Star: The World's Best Mechanical Engineer.

Joe-Henry,

Q. How do gears work?

A. Gears are an entire science of their own. They have to be designed and manufactured very precisely in order to function properly. The little bumps on gears that push on each other are called teeth.

Gears are used to speed things up, slow them down, make them more powerful, less powerful or to change the direction of rotation. But the thing to remember about gears is that there are no free rides. If you use a big gear to drive a little gear, the little gear will spin faster than the big one. But it will have less torque. Torque is a way to measure how hard it would be to stop something from spinning, like if you squeezed the shaft between your fingers.

If you use a little gear to drive a big gear, the big gear would spin slower than the big gear, but the big gear would have more torque. So more speed equals less torque, and less speed equals more torque. There is always a trade. Welcome to the first law of thermodynamics.

Gears are also used to change the direction of your rotating power. Older rear wheel drive cars had the engine in front, a drive shaft running down the middle underneath the car, and a gearbox attached to the axle. That gearbox is called a differential.

This brings me to the experiment. Normally I wouldn't suggest an experiment of this magnitude, but in our current situation I don't think it will happen any slower than the other experiments.


Look on E-bay and find yourself a 1966 Ford Galaxy 500 convertible. Have your Mom buy it. She may balk a little. Here are your sales points:

• It won't go down in value, it's collectible.

• She'll look great with her hair flowing out behind her and the top down.

• It's so mechanically simple, you can fix it for her.

• By the time you're 16, gas will be so expensive you'll only be able to drive around the block once a week. That will help keep you out of trouble.

• It's the engineers’ choice.


You'll also need a pair of jack stands, a jack and of course, a case of Mountain Dew in cans. Take a spin around town with the top down, and a Mountain Dew in hand. Your Mom will feel SO GOOD she'll realize she should have listened to all of B1-67er's engineering advice. Tune the radio to an oldies station, preferably something with some soul. If you hear any song by the band "WAR" (the World is a Ghetto, Low Rider, Summer, Me and Baby Brother, etc, etc) you will reach Engineering Nirvana. Ask your Mom to spin by Radio Shack for some of that motor wire.

When you get home, have your Dad or Mom help you put the rear end of the car up on the jack stands. Set the case of Mountain Dew under the car too for added safety and to get the Mountain Dew into some shade. With the emergency brake released, spin one of the rear wheels of the car. Surprisingly, the other rear wheel will turn the opposite direction. That's because the differential (the gearbox at the back of the car) is a very special gearbox that allows the two back wheels of your car to travel at different speeds. This makes a car drive smoothly around corners. If you think about it when you turn a tight corner in your car, the two wheels on the inside of the corner don't travel very far, but the two on the outside of the corner travel a long ways. If it wasn't for the differential, your car would kind of have to bounce and skip around corners.

Pop open a few Mountain Dews and admire your Galaxy glimmering in the sun. And here's a little tip for when you're 16. If reverse isn't working too good in the galaxy, don't park with your girlfriend with the front wheels pointed downhill against a parking block. If you don't believe me, ask B1-66er: he tried it.

There is an alternative to the admittedly costly but rewarding Galaxy experiment. You can stop by Midas and ask them if they have any rear wheel drive cars up on their lifts. If so, ask them to spin a back wheel for you.

The World's Best Mechanical Engineer


Also in this series:
busta dew
holy hydraulics, batman!
solenoid spectacular
springs & things
the world's best mechanical engineer explains it all for you

[Photo credit: b1-67er, aka The World's Best Mechanical Engineer]

Friday, June 08, 2007

busta dew


bank vault
Originally uploaded by -sou-.
Part V in The World’s Best Mechanical Engineer Explains It All for You series:

Joe-Henry,

Tell your Mom that your young mind is still very pliable. Tell her that if you don't get some science stimulation soon in the way of experimentation, you may reallocate that part of your brain to Gangsta Rap.

Now on to Airplane doors.

Q. How do airplane doors work?

A. There is no easy answer here because there are many different door designs. I'm actually somewhat familiar with them because I used to design machines that loaded cargo into aircraft.

Now since you are becoming a prodigy in Mechanical Engineering, I can run through this pretty fast. Some of the doors are moved with hydraulic cylinders, some are moved with pneumatic cylinders. For the most part latches on aircraft doors (the part that keeps it closed) are purely mechanical (no electric, pneumatic, or hydraulic latch). This way a loss of pneumatic pressure or hydraulic pressure won't cause the door to come open. Doors coming open on airplanes flying 500 miles per hour would be a BAD thing.

The pilot has indicator lights so he can tell if the door is open before he takes off. I don't know this for sure but there are also probably safety interlocks on the doors. Interlocks are cool and sometimes ingenious features that engineers add to complicated machines to help prevent people from being boneheads. They probably have the doors interlocked with the gages in the cockpit so that it does not allow you to open the plane door when you are high in the air or traveling at 500 mph.

Unfortunately you can't build an airplane door in your back yard. You can however, see the inner workings of a similar door. Hop in the car with your Mom and go to 7-11. Let your Mom drive. Buy three Mountain Dews. Now drive to a bank. Your Mom may already know of one that has a vault with glass on the inside of the door. Offer the bank manager one of the three mountain dews if he'll let you look at the back of the door up close.

If he says no, tell him a mechanical engineer told you it was imperative for your brain development.

When you're done looking at the door, bust out the other two Mountain Dews on the way home.

Then carefully drop the hint: we COULD stop by Radio Shack......


The World’s Best Mechanical Engineer


Also in this series:
holy hydraulics, batman!
solenoid spectacular
springs & things
the world's best mechanical engineer explains it all for you

Wednesday, June 06, 2007

holy hydraulics, batman!


Part IV in The World’s Best Mechanical Engineer Explains It All for You series:

Joe-Henry,

Q. How do you move the wings on the end of an airplane up and down?

A. I think you're talking about the ailerons. They are used to control the banking (or leaning) of the aircraft.

Almost all of the moving devices on an airplane are controlled by hydraulic cylinders. Hydraulics is one of my specialties, as much as I have a specialty. A hydraulic cylinder works just like a pneumatic cylinder, except it uses oil instead of air to move the cylinder.

Hydraulics are way more powerful than pneumatics. All the big machinery that you see is hydraulically powered, things like cranes, forklifts, and bulldozers.

Pneumatics operate at around 100 pounds per square inch (about the same as your Mom accidentally stepping on your toe). Hydraulics usually run at around 3000 psi (about the same as a Tyranosaurus Rex stepping on your toe). Because hydraulics are so powerful, you can put a very mighty device in a very small space. That's why they use them on airplane ailerons.

Armed with the power of hydraulics you will now amaze the world by lifting your Mom. Here's how:

Go to the grocery store and buy three things: a roll of duct tape (the good stuff, not some crummy no name brand), a pair of rubber gloves, and that's right... you guessed it.... a two liter bottle of Mountain Dew. But this time the science isn't just an elaborate ploy to get great soda. You actually NEED the Mountain Dew ......bottle. You'll also need a board, like a piece of plywood, big enough to set a chair on.

Then go to a good record store and buy Thomas Dolby's "The Golden Age of the Wireless" CD.

Go home and chug that bottle of Mountain Dew with your Mom. Now squash the two liter bottle flat (but don't put any holes in it). Take the bottle, rubber gloves, a chair, and duct tape out to the garden hose. Dry off the end of the hose, and the top of the bottle.

Put the end of the hose against the end of the bottle.

Now wrap the rubber glove tightly around the connection between the bottle and the hose.

Secure the glove with duct tape. Now wrap the entire joint thoroughly with the duct tape. Overlap a lot of the bottle, and a lot of the hose.

When you think you have enough, put some more on, you'll probably just get one shot at this. Now set the bottle on the ground flat. Set the board on top of it with the hose and bottle neck sticking out, and the chair on top of the board in arms reach of the water spigot.

Put the Thomas Dolby in the CD player and put on "She Blinded Me With Science". Have your mom sit in the chair. Yell, "SCIENCE!" with Thomas Dolby, and turn on the hose just a LITTLE. Hop on your mom's lap, she'll cushion your fall if something goes wrong. The water will lift you and your mom up until the bottle is full or nearly full. If your connection between the hose and bottle leaks, turn up the flow. When the pressure becomes too great, your duct tape will come loose, and the board, chair, Mom and scientist will all drop back to the ground, so keep the fingers and toes out from under that board.

You just lifted your Mom with a few psi[1] of water pressure. Just imagine what you could do with thousands of psi! A cylinder the diameter of a golf ball can lift your Mom's entire car. A few small cylinders could lift your house!

The World’s Best Mechanical Engineer


[1] pounds per square inch -- a unit of pressure


Also in this series:
solenoid spectacular
springs & things
the world's best mechanical engineer explains it all for you

Tuesday, June 05, 2007

solenoid spectacular

Part III in The World’s Best Mechanical Engineer Explains It All for You series:

Joe-Henry,

Q: How does the driver of the max train control the doors?

A. This is probably the most complicated question you asked, so tell your Mom to get the car keys.

The pneumatic cylinder in the door is controlled by a solenoid valve. A solenoid is a magnet that you can turn on and off using electricity. This magnet moves a valve that allows air to flow to the pneumatic cylinder. A valve is something that turns flow on and off, or redirects it. When you turn on the water in the kitchen sink, you are turning on a valve.

Why don't they just put a bunch of valves like your kitchen sink in the driver’s compartment you ask? Because there are so many things for the driver control. Every car in the train has lights, brakes, doors (probably on both sides) and maybe a bunch of stuff we don't even know about. The driver would need a huge room of controls and there would be hundreds of air hoses between the cars of the train. If you look between the cars, there is probably one or two electrical cables connecting them.

Now it is time for you to make a solenoid. Go to the Radio Shack and get a spool of wire. Preferably "Motor Wire"- thin wire with thin clear insulation. If you can't get motor wire, get the smallest diameter regular wire that you can find. Sometimes radio shack has magnets. If they have any magnets shaped like small rods, buy at least one. Buy a D size battery too.

Now go to a good hobby shop. You need to get a piece of tubing that is just a little bigger around than your rod shaped magnet. Brass is ok, aluminum is ok, plastic is ok, even cardboard is ok. Don't buy a steel tube. If you couldn't get a rod shaped magnet at Radio Shack, the hobby shop should have something. The rod shaped magnet should slide easily in the tube. If all else fails you can make a tube by curling up a piece of cardboard, but it will be kind of hard to work with.

Have your Mom stop at 7-11 and pick up a six pack of Mountain Dew on the way home. This is going to take a little while.

When you get home, wrap a piece of tape around and around and around the outside of the tube at the end. Do this until the tape is about 1/4" thick. Now do the same thing again about an inch down the tube.

You have made a spool to wrap your wire around. Now wrap your wire around the spool as tightly as possible. Leave about 6" of wire outside of the spool at the beginning. Start at one end of the spool, and wind to the other. When you get to the end, bring the wire back to the beginning of the spool and start winding again. The more layers you make, the more powerful your solenoid. So wrap until you're out of wire or until your Mom starts talking about bedtime. Leave about 6" of wire hanging off the end also. Wrap a little tape around the wire so it doesn't come unwound. Scrape the insulation off of both wire ends.


When you get to the end of the spool, bring the wire back to the beginning and start winding again.


Pop open one of those Mountain Dews. Enjoy the anticipation of firing up your creation. Share one with your Mom.

You're ready. Put the magnet inside the tube. Touch one wire to one end of the battery, the other wire to the other end of the battery. One of two things will happen: either the magnet will get sucked into the tube, or the magnet will get shot out of the tube. Reverse the wires, and the opposite will happen.

This is how a valve gets shifted by a solenoid. Most pneumatic cylinders are controlled this way.

The World’s Best Mechanical Engineer


Also in this series:
holy hydraulics, batman!
springs & things
the world's best mechanical engineer explains it all for you

Saturday, June 02, 2007

springs & things

Part II in The World’s Best Mechanical Engineer Explains It All for You series:

Joe-Henry,

Q. Do the black strings stretch on Max Train?

A. Springs are made out of special steel that is very, very strong. Steel is mostly made of iron, but they add tiny amounts of other things to make it stronger or make it so it won't rust. Spring steel has more than the usual amount of carbon added to it, which makes it super hard to bend. Carbon is an element that many things contain, all plants and animals. Your pencil lead isn't really lead at all, it is carbon. Diamonds are crystals of carbon.

Carbon is common and not rare or expensive. The reason they don't add it to all steel is that it makes the steel very hard to work with. It's difficult to drill holes in, and you can't weld it (join it to another piece of steel by melting it). So mostly just springs are made of this material. The other thing they do to make springs very strong is heat treatment. If you heat and cool steel in the right ways, you can change it's properties, for example make it harder or stronger.


Ten
Originally uploaded by Big-E-Mr-G.


To see how this works, you can heat treat a coin. Have your Mom help you with this. Get a very shiny nickel, dime, and quarter. Set them on the oven burner on "high". When the burner turns red hot, you will see the coins gradually turn different colors. Probably browns and blues. Use tongs to take them off the burner when you like the color.

Drop them in a glass of ice water. You now have colored coins. Heat treatment works just like this but at higher temperatures. Tell your Mom you have to keep them as part of your scientific research.

So springs are made of very strong steel. If they are designed properly, they will not break, even over long periods of time. But they do tend to, "break down". This means if they are pushed on for many years over and over, they tend to get a little shorter over a long period of time. So now they aren't quite as springy as they used to be. Sometimes they have to be replaced because of this.

The World’s Best Mechanical Engineer

Also in this series:
holy hydraulics, batman!
solenoid spectacular
the world's best mechanical engineer explains it all for you

the world's best mechanical engineer explains it all for you

boarding the train


With special guest star: The World's Best Mechanical Engineer.

Joe-Henry of Mommy's in a Timeout fame had some questions for the World's Best Mechanical Engineer. Many, many questions, actually -- as a six-year old boy is wont to have.

Here's one puzzle made plain by the b1-67er, aka the World's Best Mechanical Engineer:

Q. How do the doors on the Max train open?

A. I'm not familiar with this particular train, but I can probably answer this question right anyway. Almost all doors on trains that are automatic are pneumatic. This means that they are moved with air. Air is blown into a device called a pneumatic cylinder. It is basically a tube that is plugged at one end, and has a movable rod plugging the other end. When you blow air into the tube, the air pushes the rod out of the tube.

To see what I mean, go to Taco Bell. Order a large Mountain Dew. Make sure to get a straw that is covered that is covered with paper. Tear the paper off of one end of the straw, but leave the rest of the straw covered with paper. Blow hard into the open end of the straw. The paper cover will go flying off of the straw.

Congratulations, you've just made the world's cheapest pneumatic cylinder. Celebrate by drinking your large Mountain Dew.

The beauty of pneumatics is that they push hard, but not so hard that you'll squash someone like a bug. Pneumatics are lightweight and can be fit into pretty small spaces, like the train door.


(Did I mention that he's the World's Best Mechanical Engineer?)


Also in this series:
holy hydraulics, batman!
solenoid spectacular
springs & things

Thursday, May 24, 2007

superfluous beauty

The World’s Best Mechanical Engineer (don’t believe me? Ask Google.), he who brought you the largest pinhole camera never realized, is back with something real: the coolest Romaine and Greenleaf Lettuce Harvester ever.

Not that I know from lettuce harvesters. But here’s what makes it the coolest: Not only is it, I’m sure, better at harvesting romaine than any other harvester out there (I stake this assumption on my confidence in the engineer – the world’s best) but it does that one step better, because it does it with a splash of beauty.

There’s a grill on this hulking beast, and b1-67er (aka the world’s best mechanical engineer) dressed it up right in Art Deco style, with a nod to the age of the machine, and designed something entirely superfluous, and entirely right.

Just because.

I love that.

Related Posts with Thumbnails